how to integrate KinCony modbus energy meter to home assistant using raspberry pi's RS485 port
A. use "inCony_Meter_config_tool" change RS485 " Parity: EVEN " to " Parity: NONE ", because we found home assistant can't work with "EVEN", KinCony energy meter default setting is "EVEN".
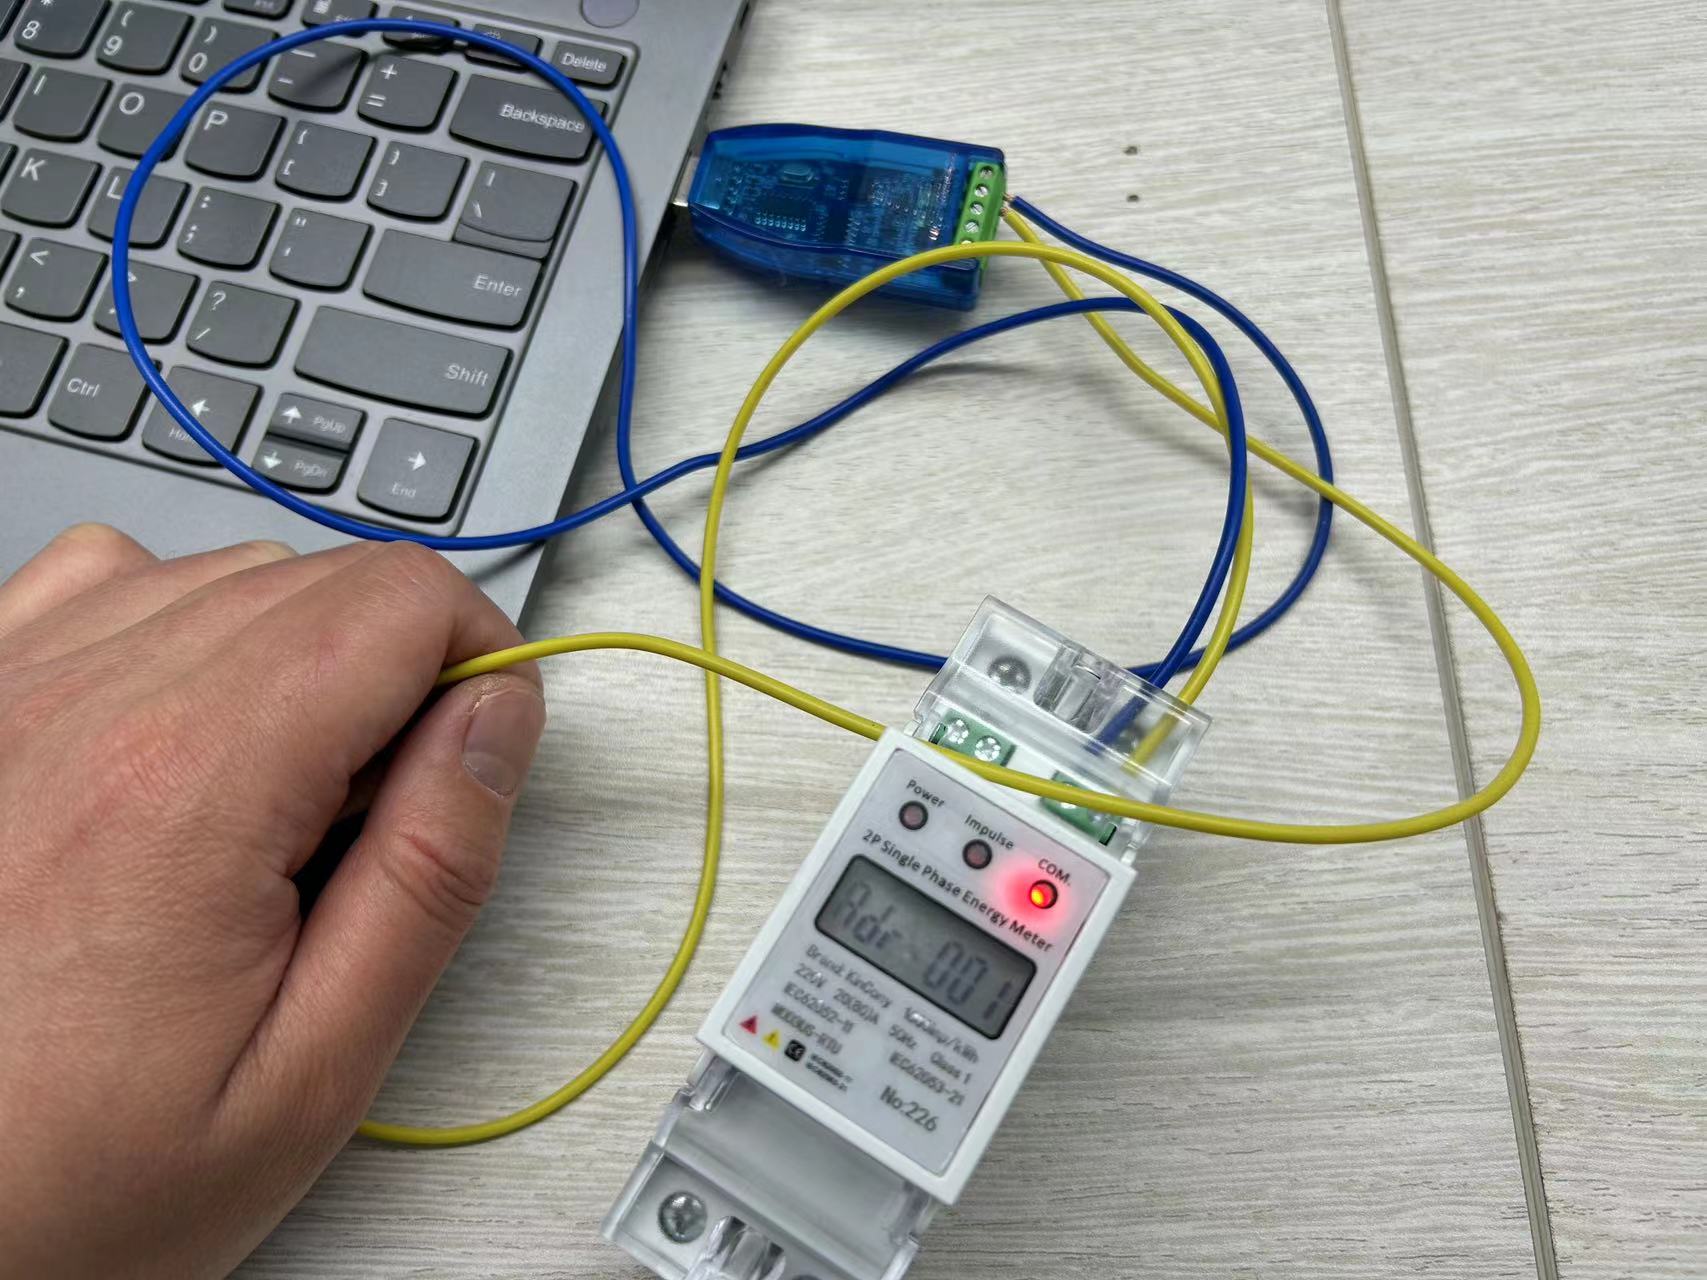
A-1: connect energy meter to PC by USB-RS485 adatper:
A-2: first time, use RS485 setting, Parity: EVEN (Chinese word on left is : 偶校验) click "打开" (open serial port) button.
 KinCony_Meter_config_tool.zip (Size: 20.55 KB / Downloads: 479)
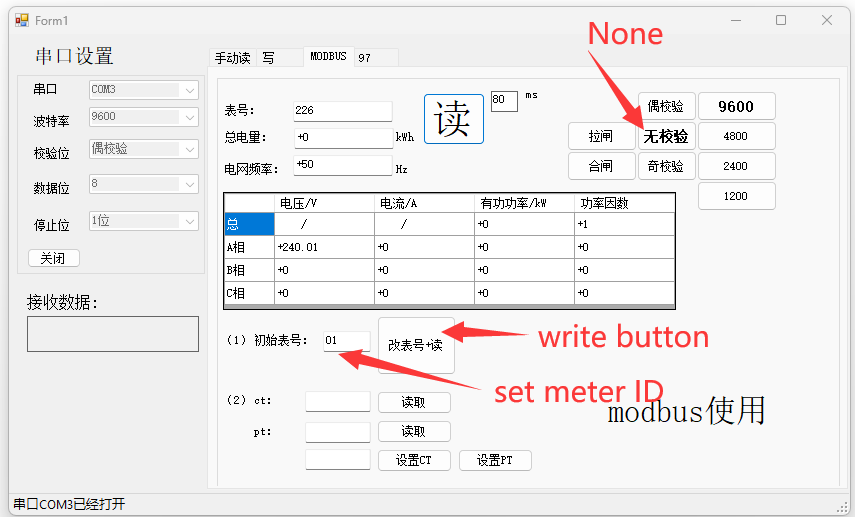
A-3: click "无校验" (None) button, set Parity: NONE
until now, "Parity" is set completed.
if you want change meter ID from 1, you can "set the meter ID", such as input 1,2,3,.... then click "改表号+读" (write button), it will set the ID for meter.
if you have changed Parity: NONE, you want connect to serial port again, you need change serial setting, Parity=None, Chinese word is "无校验",then click "读" (Read) button, you will read all data from meter.

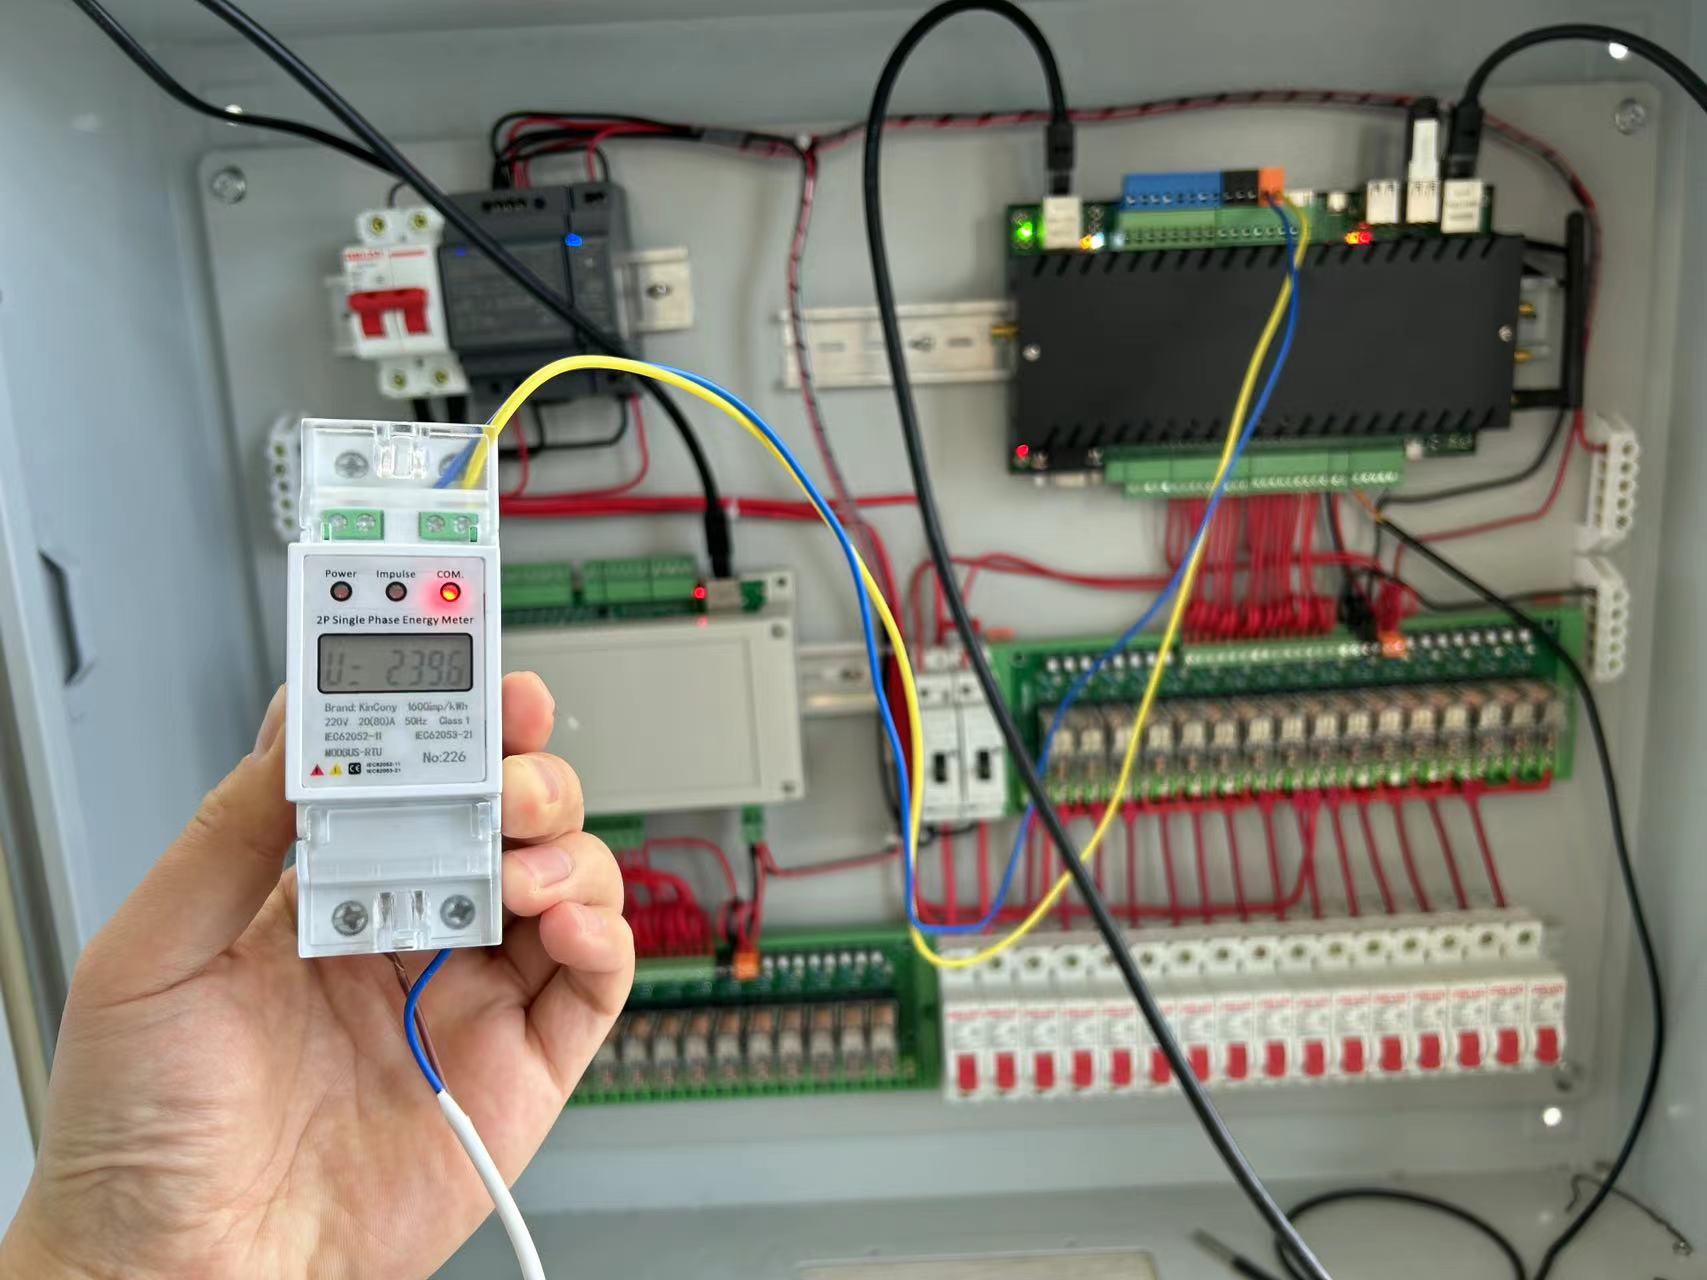
now the meter hardware setting is complete, then you can connect meter to KC868-Server or Server-Mini's RS485 port directly. see photo:
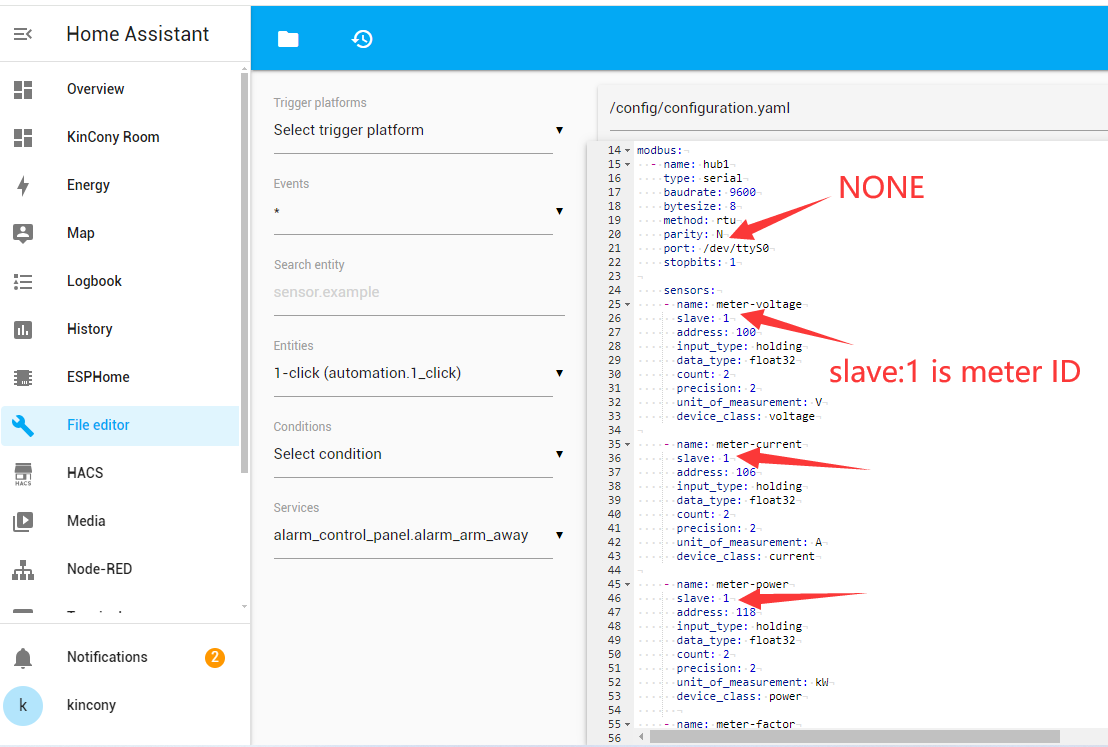
config HA yaml as here:
 KinCony_modbus_meter.txt (Size: 1.43 KB / Downloads: 386)
modbus:
- name: hub1
type: serial
baudrate: 9600
bytesize: 8
method: rtu
parity: N
port: /dev/ttyS0
stopbits: 1
sensors:
- name: meter-voltage
slave: 1
address: 100
input_type: holding
data_type: float32
count: 2
precision: 2
unit_of_measurement: V
device_class: voltage
- name: meter-current
slave: 1
address: 106
input_type: holding
data_type: float32
count: 2
precision: 2
unit_of_measurement: A
device_class: current
- name: meter-power
slave: 1
address: 118
input_type: holding
data_type: float32
count: 2
precision: 2
unit_of_measurement: kW
device_class: power
- name: meter-factor
slave: 1
address: 142
input_type: holding
data_type: float32
count: 2
precision: 2
# unit_of_measurement:
device_class: power_factor
- name: meter-frequency
slave: 1
address: 144
input_type: holding
data_type: float32
count: 2
precision: 2
unit_of_measurement: Hz
device_class: frequency
- name: meter-consumption
slave: 1
address: 0
input_type: holding
data_type: float32
count: 2
precision: 2
unit_of_measurement: kWh
device_class: energy_storage
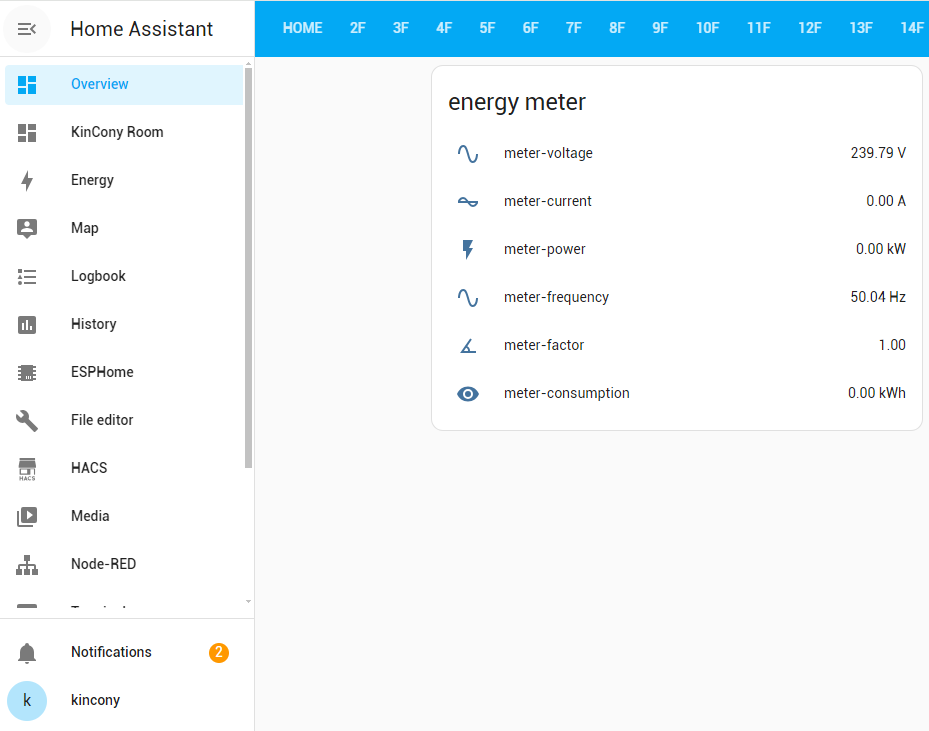
add meter to HA dashboard:
A. use "inCony_Meter_config_tool" change RS485 " Parity: EVEN " to " Parity: NONE ", because we found home assistant can't work with "EVEN", KinCony energy meter default setting is "EVEN".
A-1: connect energy meter to PC by USB-RS485 adatper:
A-2: first time, use RS485 setting, Parity: EVEN (Chinese word on left is : 偶校验) click "打开" (open serial port) button.
 KinCony_Meter_config_tool.zip (Size: 20.55 KB / Downloads: 479)
A-3: click "无校验" (None) button, set Parity: NONE
until now, "Parity" is set completed.
if you want change meter ID from 1, you can "set the meter ID", such as input 1,2,3,.... then click "改表号+读" (write button), it will set the ID for meter.
if you have changed Parity: NONE, you want connect to serial port again, you need change serial setting, Parity=None, Chinese word is "无校验",then click "读" (Read) button, you will read all data from meter.
now the meter hardware setting is complete, then you can connect meter to KC868-Server or Server-Mini's RS485 port directly. see photo:
config HA yaml as here:
 KinCony_modbus_meter.txt (Size: 1.43 KB / Downloads: 386)
modbus:
- name: hub1
type: serial
baudrate: 9600
bytesize: 8
method: rtu
parity: N
port: /dev/ttyS0
stopbits: 1
sensors:
- name: meter-voltage
slave: 1
address: 100
input_type: holding
data_type: float32
count: 2
precision: 2
unit_of_measurement: V
device_class: voltage
- name: meter-current
slave: 1
address: 106
input_type: holding
data_type: float32
count: 2
precision: 2
unit_of_measurement: A
device_class: current
- name: meter-power
slave: 1
address: 118
input_type: holding
data_type: float32
count: 2
precision: 2
unit_of_measurement: kW
device_class: power
- name: meter-factor
slave: 1
address: 142
input_type: holding
data_type: float32
count: 2
precision: 2
# unit_of_measurement:
device_class: power_factor
- name: meter-frequency
slave: 1
address: 144
input_type: holding
data_type: float32
count: 2
precision: 2
unit_of_measurement: Hz
device_class: frequency
- name: meter-consumption
slave: 1
address: 0
input_type: holding
data_type: float32
count: 2
precision: 2
unit_of_measurement: kWh
device_class: energy_storage
add meter to HA dashboard:
YouTube: https://www.youtube.com/c/KinCony
Online Store: https://shop.kincony.com
Alibaba Store: https://kincony.en.alibaba.com/
Online Store: https://shop.kincony.com
Alibaba Store: https://kincony.en.alibaba.com/


