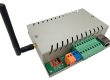
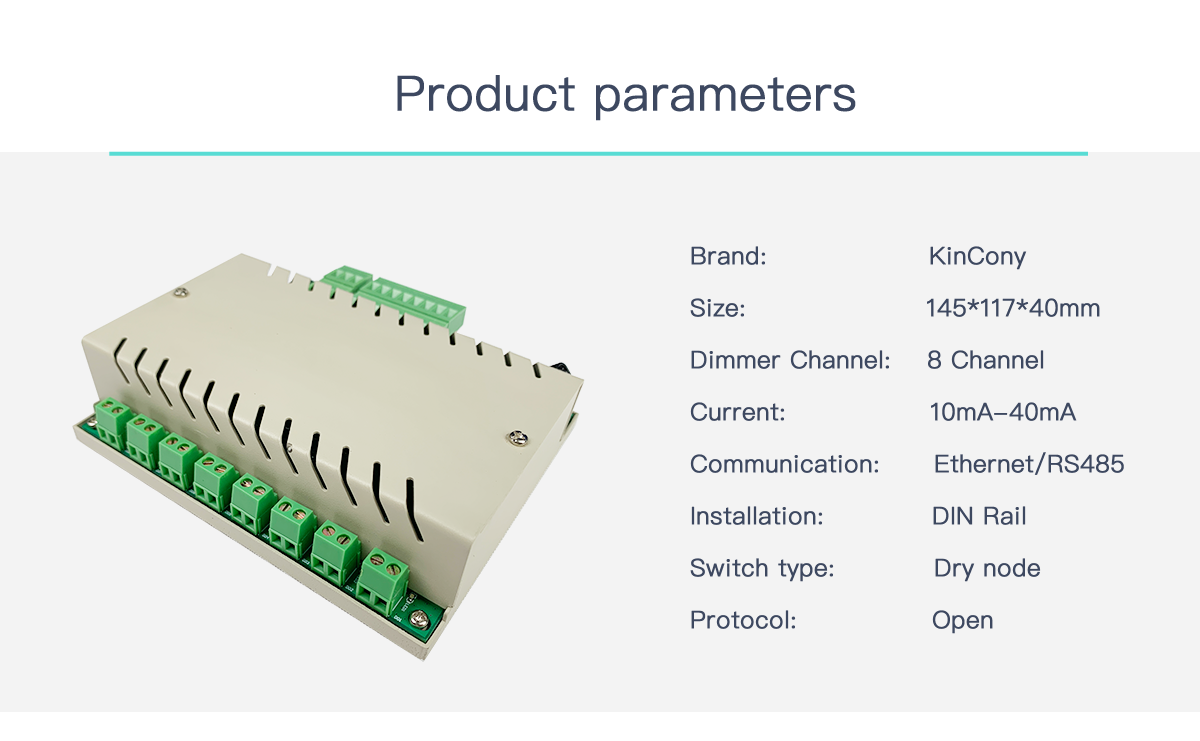
KC868-D8 smart dimmer controller support HTTP, MQTT for home assistant.

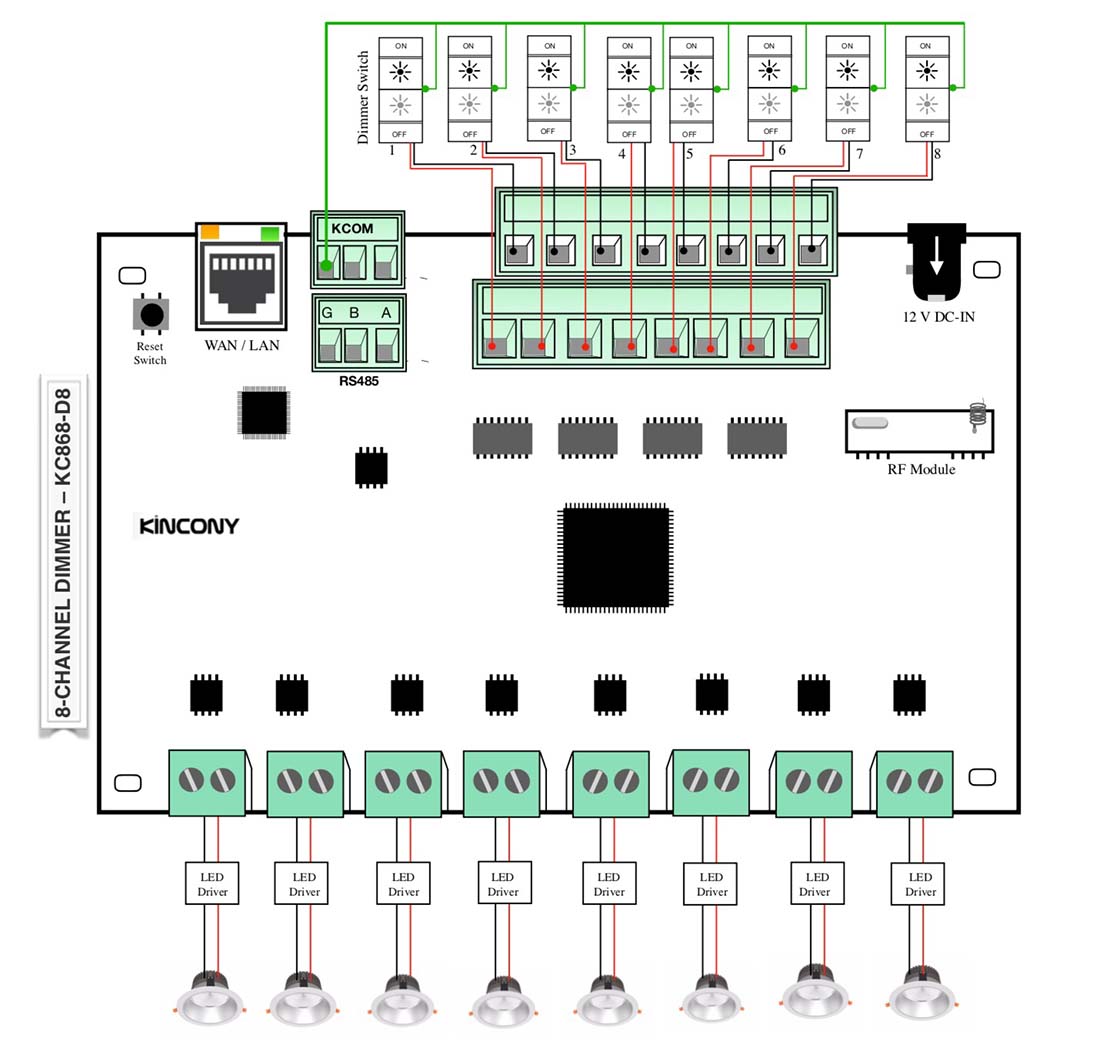

Solution A: KC868-D8 dimmer controller work with DC12V or DC24V LED strip by Power Driver
Solution B: KC868-D8 dimmer controller work with AC220V or AC110V lamp by analog SSR

1. What switch panel or buttons can be used?
KC868-D8 input ports (K1+ — K8+) and (K1- — K8-) support dry contact signal. You can use any dry contact switch buttons. Such as “K1+” for channel 1 brightness up, you just use “K1+” and “KCOM” for one button. “K2+” for channel 2 brightness up, you just use “K2+” and “KCOM” for another button…… wire distance between D8 controller and switch button MAX support 1000 meter. If use >= V4.34 firmware, support “1 Key” mode, every output use 1 wire for button change the brightness output.
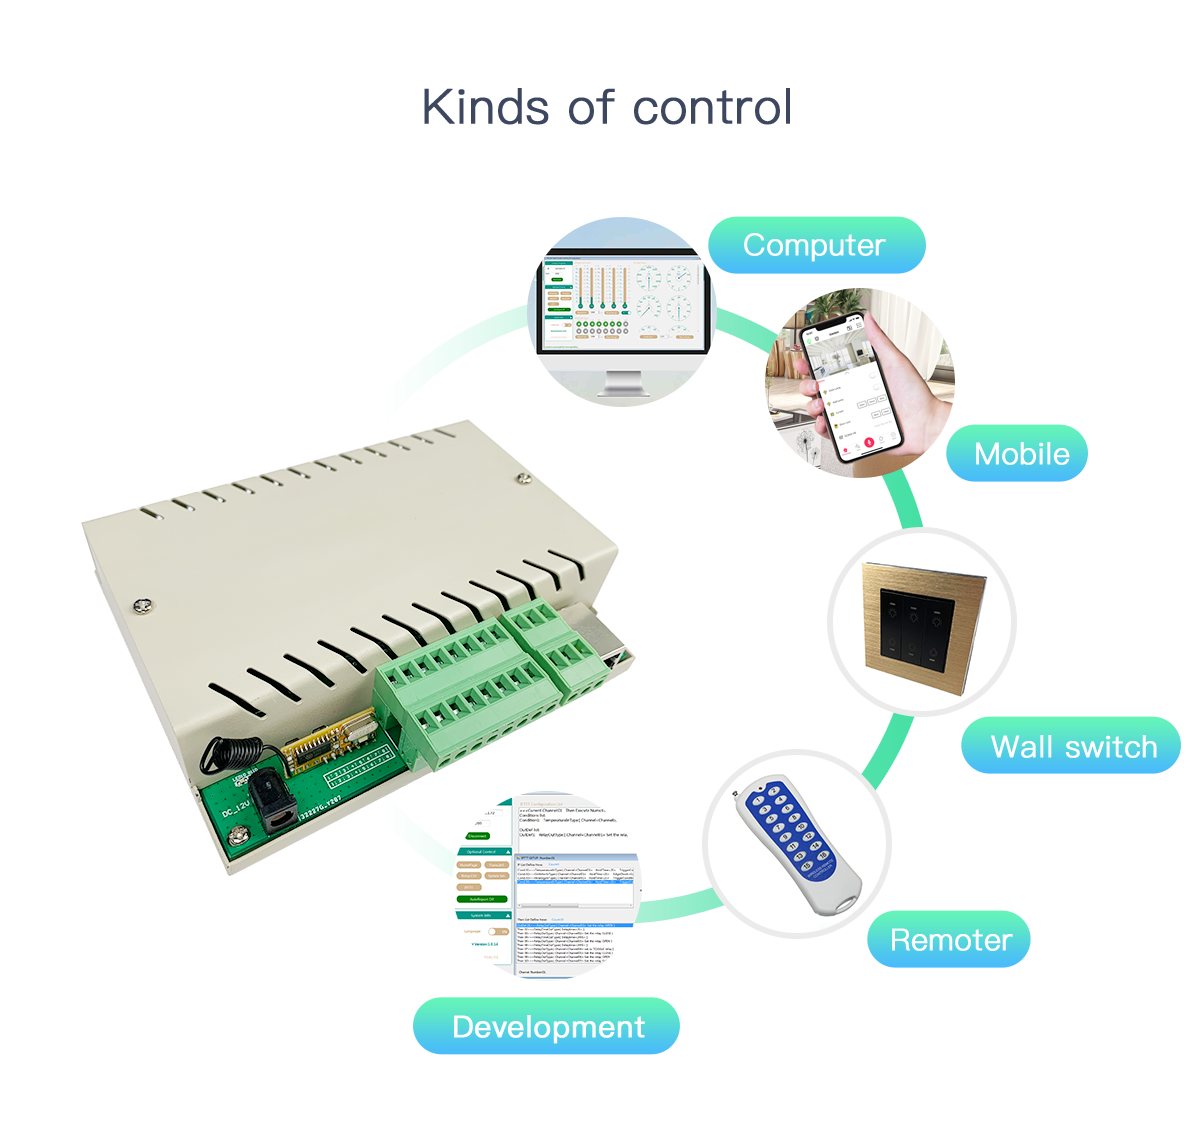
2.Manual control and wireless remoter control (by the same work way):
A.Manual control switch for dimmer, 16 ports for input, every 2 ports are brightness+ and brightness- for every channel dimmer.
For example:
a. set switch by “2 Key” mode:
Hold on “K1+” , the output1 brightness will increase and gradually increase to the brightest state.
Hold on “K1-” , the output1 brightness will decrease, and gradually reduce to the darkest (off state) state.
short click on “K1+”, the output1 lamp will be ON (MAX brightness).
short click on “K1-“, the output1 lamp will be OFF (MIN brightness).
Other channel lamp is the same.
—————————————————-
b. set switch by “1 Key” mode:
Hold on “K1+” , the output1 brightness will increase brightness until to 99% –> 0% –>99% –>0% –>99% always loop.
short click on “K1+”, if your lamp is ON (1%–99%), then will be turn OFF. If your lamp is OFF (0%) , then will be turn ON (set to 99%).
—————————————————
B. Remoter control dimming, 16 key wireless remoter, a total of 16 keys, each two keys to “brightness increase”, “brightness decrease” function, press and hold the key, it will continue to change slowly.
For example:
Hold on remoter’s “button1”, output1 will increase brightness. Hold on “button2”, output1 will decrease brightness.
Hold on remoter’s “button3”, output2 will increase brightness. Hold on “button4”, output2 will decrease brightness.
Hold on remoter’s “button5”, output3 will increase brightness. Hold on “button6”, output3 will decrease brightness.
Hold on remoter’s “button7”, output4 will increase brightness. Hold on “button8”, output4 will decrease brightness.
Hold on remoter’s “button9”, output5 will increase brightness. Hold on “button10”, output5 will decrease brightness.
Hold on remoter’s “button11”, output6 will increase brightness. Hold on “button12”, output6 will decrease brightness.
Hold on remoter’s “button13”, output7 will increase brightness. Hold on “button14”, output7 will decrease brightness.
Hold on remoter’s “button15”, output8 will increase brightness. Hold on “button16”, output8 will decrease brightness.
short click on remoter’s “decrease function” button (button2,4,6,8,10,12,14,16) will turn OFF (0%) lamp.
—————————————————-
3.Network Reset
if you forgot the IP addrss of your dimmer controller. You can hold on the reset button beside RJ45 port for about 3 seconds, and the KC868-D8 controller will automatically return to the following worke mode:
IP:192.168.1.200
Port:4196
Work Mode:TCP Server
4.How to use Ethernet port to config IP and different work mode
A.use Ethernet port to config IP and different work mode by “KinCony-SCAN_Device Tool” for KC868-xB/xBS/D8” series (Recommend)
Let your KinCony smart controller connect to your router by ethernet cable (CAT5) and your computer also connect with your same router, download “KinCony-SCAN_Device Tool” and unzip file, open “KinCony-SCAN_Device.exe”
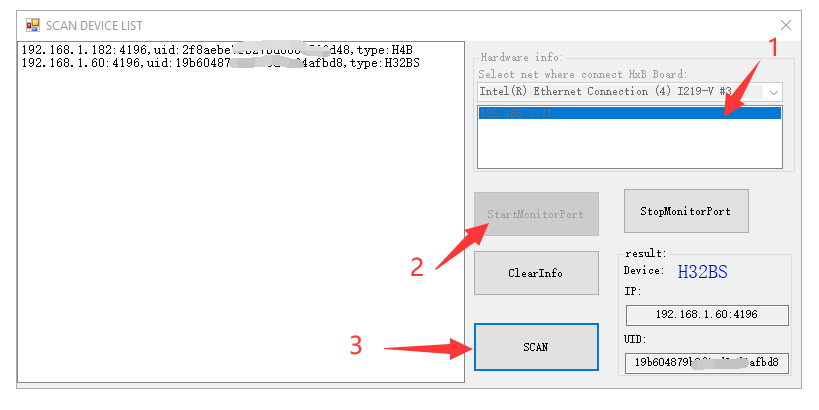
Step1: chose your network device of your computer.
Step2: click “StartMonitorPort” button.
Step3: click “SCAN” button.
Now all KinCony Controller (KC868-HxB or KC868-HxBS) will be see. You will see the device IP,Port,UID,type.
Config “Work Mode” in Dimmer browser website:
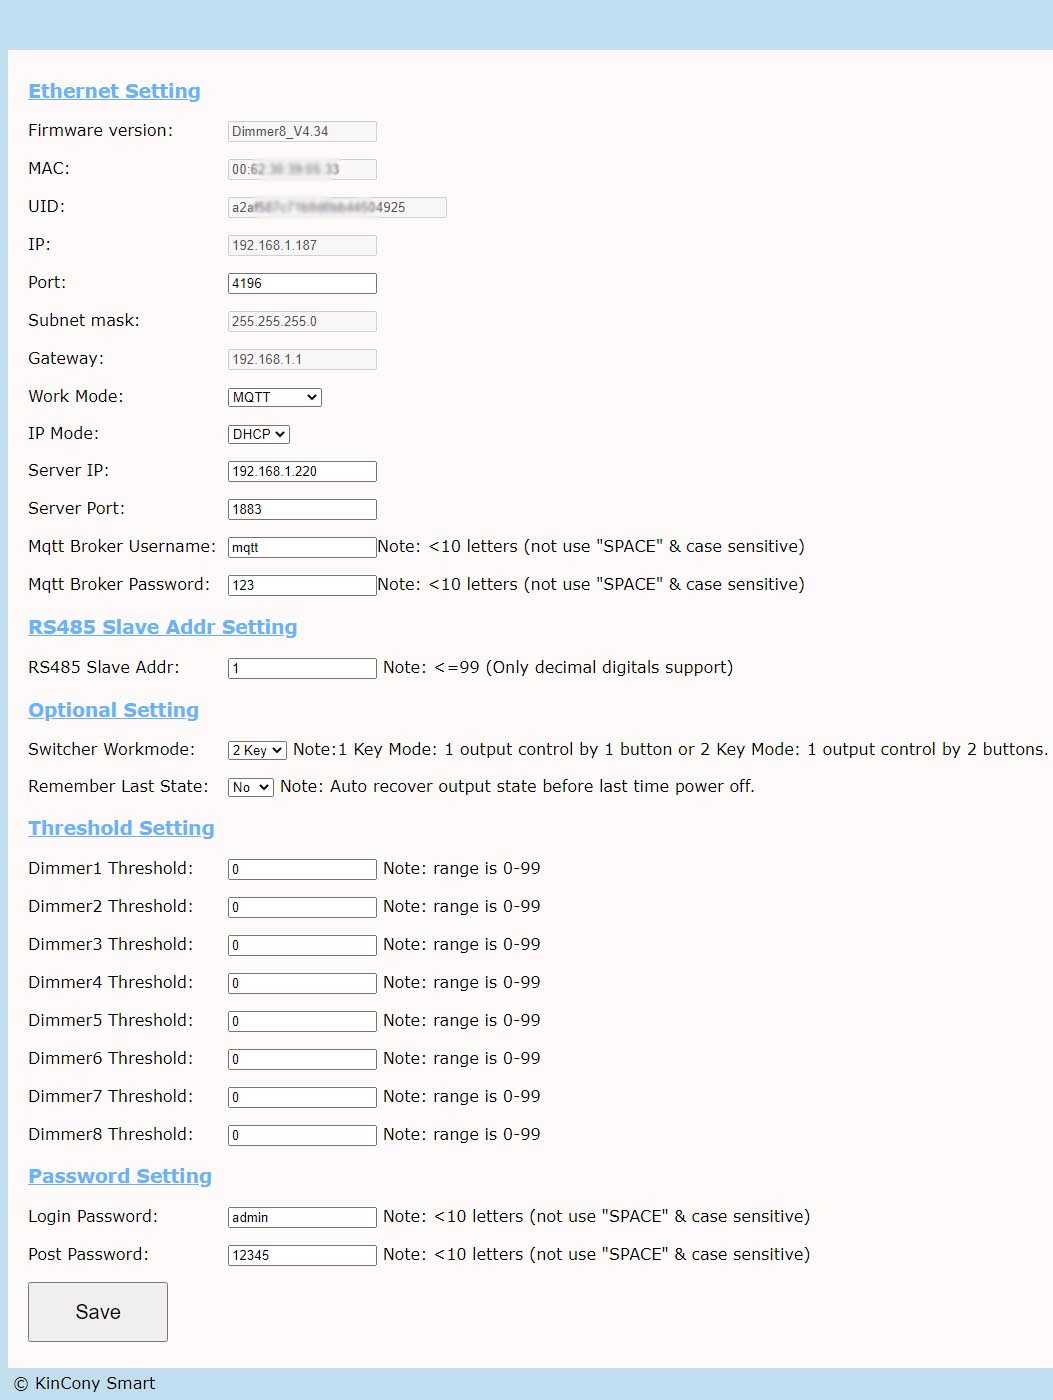
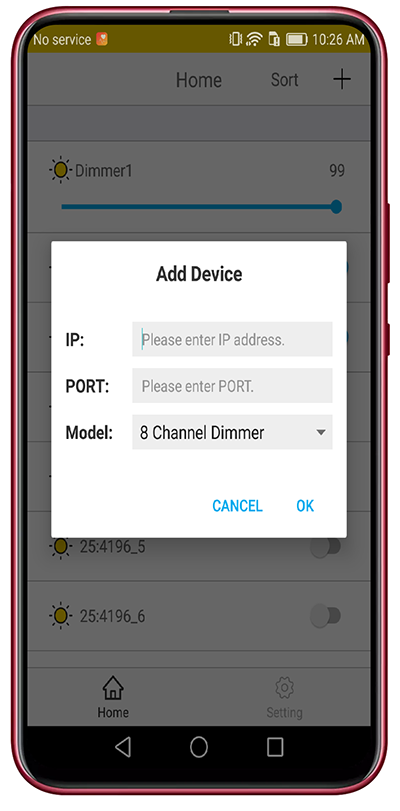
1- TCP Server: Work in local network without internet, you can use “KBOX” mobile phone application.
2- TCP Client: This mode for programmer or developer, controller can connect to your own cloud server by TCP socket connection.
3- MQTT: integrate with third party software by MQTT protocol, such as home assistant or Node-Red or Domoticz.
4- Threshold setting: Adjustment startup percent options for every channel output. sometimes LED SSR driver begin work with 10-20% brightness.
5.Ethernet HTTP MQTT TCP RS485 Protocol (For software developer)
https://www.kincony.com/download/KC868-D8-http-mqtt-tcp-protocol-command.pdf
YouTube video tour: https://youtu.be/cKgbX8nO0jQ
KinCony technical support forum: https://www.kincony.com/forum/