[vc_row][vc_column][vc_column_text]1.Diagram
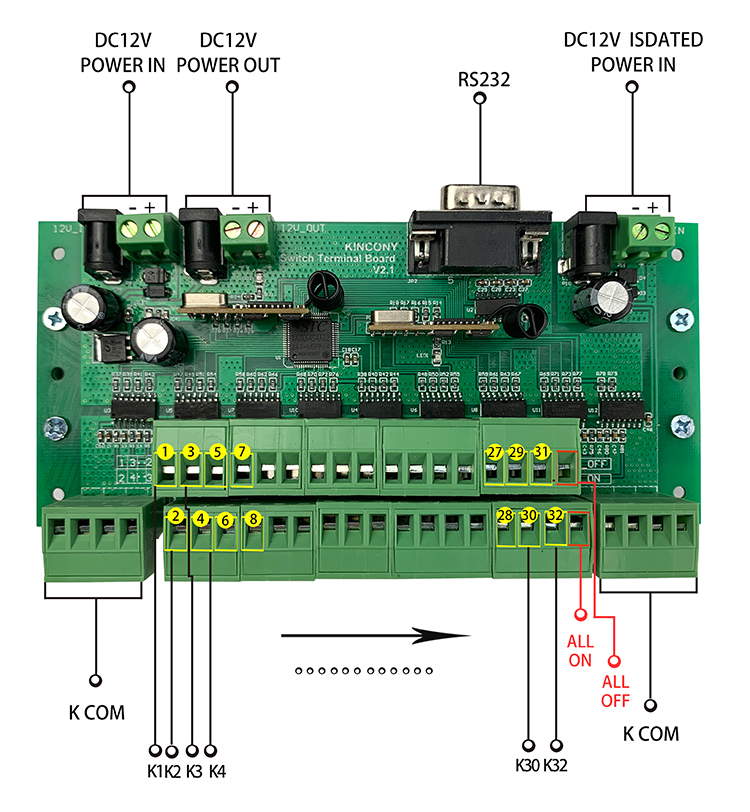
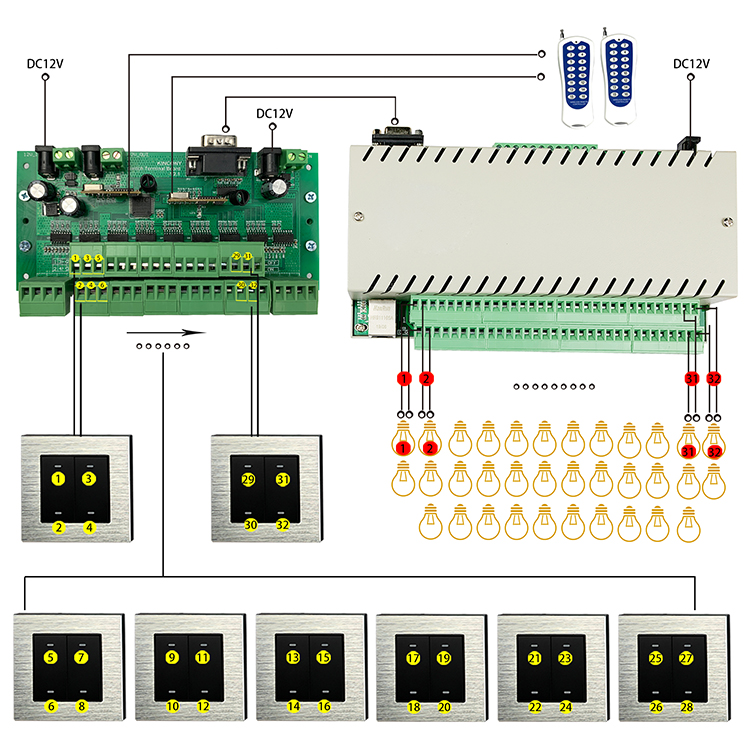
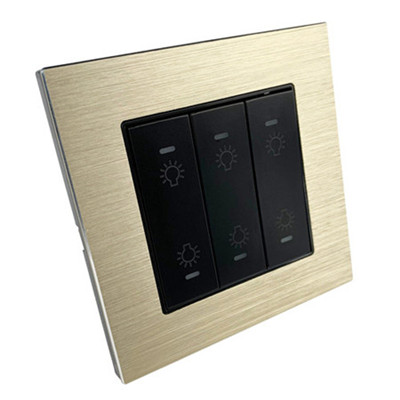
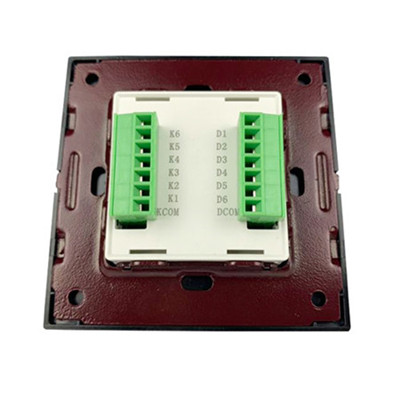
K1–K6:key line
KC:key Common
D6–D1:LED display (LED Supply Power: DC12V)
DC:LED Common
K1….K32,ALL ON, ALL OFF line connect with dry contactor button. every button need 1 line, another is Common line.
How to use wireless remoter:
Before the first use, it is necessary to learn signal code the remoter with the wireless receiving module (learn two 16 key wireless remoter respectively):
1. Press the small white button on the wireless module to clear the code (about 15 seconds) until the red LED off on the wireless receiving module.
2. Press the small white button on the receiving module to learn wireless signal, and then press any number key on the remoter , such as key “1”. After learn signal successful, the red LED red on the wireless receiving module will flash several times.
At this time, the 1-16 key can be used to control each relay switch. 17-32 key learning way is same for second remoter and wireless receive module.
Switch terminal board work mode exchange:
Press “ALL OFF” button for 5 times. Will change to another work mode:
1: Light mode: every input port control one relay output. (When change to this mode, relay32 will turn ON/OFF for 3 times quickly)
2: Motor mode:every two input ports control one motor for two relay output. (When change to this mode, relay32 will turn ON/OFF for 3 times slowly)
3: Work mode state save to EEPROM so that remember the setting.
Protect:
Every relay when turn ON in “motor mode” will auto off after 1 minute.
what’s “motor” work mode?
This is input K ports on switch terminal board connect with dry node switch button.
| K1 | K3 | K5 | K7 | K9 | K11 | K13 | K15 | K17 | K19 | K21 | K23 | K25 | K27 | K29 | K31 | ALL OFF |
| K2 | K4 | K6 | K8 | K10 | K12 | K14 | K16 | K18 | K20 | K22 | K24 | K26 | K28 | K30 | K32 | ALL ON |
K1 is motor1’s up
K2 is motor1’s down
K3 is motor2’s up
K4 is motor2’s down
…………………………
K31 is motor16’s up
K32 is motor16’s down
Function:
Press K1: relay1 OFF,delay 0.2S,relay2 OFF,delay 0.2S,relay1 ON
Press K1 again: relay2 OFF,delay 0.2s,relay1 OFF
Press K1 again: relay1 OFF,delay 0.2S,relay2 OFF,delay 0.2S,relay1 ON
Press K1 again: repeat…
Press K2: relay2 OFF,delay 0.2S,relay1 OFF,delay 0.2S,relay2 ON
Press K2 again: relay1 OFF,delay 0.2S,relay2 OFF
Press K2 again: relay2 OFF,delay 0.2S,relay1 OFF,delay 0.2S,relay2 ON
Press K2 again: repeat…
Press K3: relay3 OFF,delay 0.2S,relay4 OFF,delay 0.2S,relay3 ON
Press K3 again: relay4 OFF,delay 0.2S,relay3 OFF
Press K3 again: relay3 OFF,delay 0.2S,relay4 OFF,delay 0.2S,relay3 ON
Press K3 again: repeat…
Press K4: relay4 OFF,delay 0.2S,relay3 OFF,delay 0.2S,relay4 ON
Press K4 again: relay3 OFF,delay 0.2S,relay4 OFF
Press K4 again: relay4 OFF,delay 0.2S,relay3 OFF,delay 0.2S,relay4 ON
Press K4 again: repeat…
……………………….. until K32
Press ALL ON: relay1-32 all off
delay 0.2S
relay1,3,5,7,9,11,13,15,17,19,21,23,25,27,29,31 ON
Press ALL ON again: relay1-32 all off
Press ALL ON again:
relay1-32 all off
delay 0.2S
relay1,3,5,7,9,11,13,15,17,19,21,23,25,27,29,31 ON
Press ALL ON again:repeat…
Press ALL OFF: relay1-32 all off
delay 0.2S
Relay2,4,6,8,10,12,14,16,18,20,22,24,26,28,30,32 ON
Press ALL OFF again: relay1-32 all off
Press ALL OFF again:
relay1-32 all off
delay 0.2S
Relay2,4,6,8,10,12,14,16,18,20,22,24,26,28,30,32 ON
Press ALL OFF again:repeat…
Click to see video how to use

